Areas for Staff Sign-In
The Areas function allows you to control which parts of a site staff members are permitted to access when signing in. Site administrators can create defined areas within a site and assign staff members with authorisations to those areas, which determines which areas they can select during the sign-in process.
When signing in, staff are prompted to select the area they will be accessing and can only choose from areas they have been assigned. This selection is recorded against their sign-in and can be viewed in reporting within VR Portal, providing visibility of where staff were working while onsite.
When signing in, staff are prompted to select the area they will be accessing and can only choose from areas they have been assigned. This selection is recorded against their sign-in and can be viewed in reporting within VR Portal, providing visibility of where staff were working while onsite.
Enabling the Areas Function
The Areas function must first be enabled in both VR Portal and the VisitorRego software. Enabling it in VR Portal makes the menu option visible, while enabling it in the software ensures the function actually works during the sign-in process.
Enable in VR Portal
2. Hover over My Site  in the navigation menu on the left.
3. Click on Settings in the My Site menu.
4. Under the Features section, check the box next to Areas to enable the function.
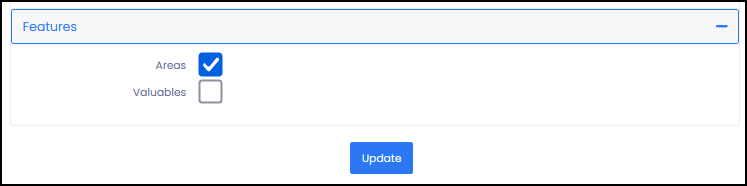
5. Click the Update button.
6. Refresh your browser to display the Areas option in the navigation menu.

If Areas does not appear in the navigation menu, log out of VR Portal and log back in. The menu option should then be visible.
Enable in the Software
1. From VisitorRego’s Admin mode, select Options to open the System Setup menu.
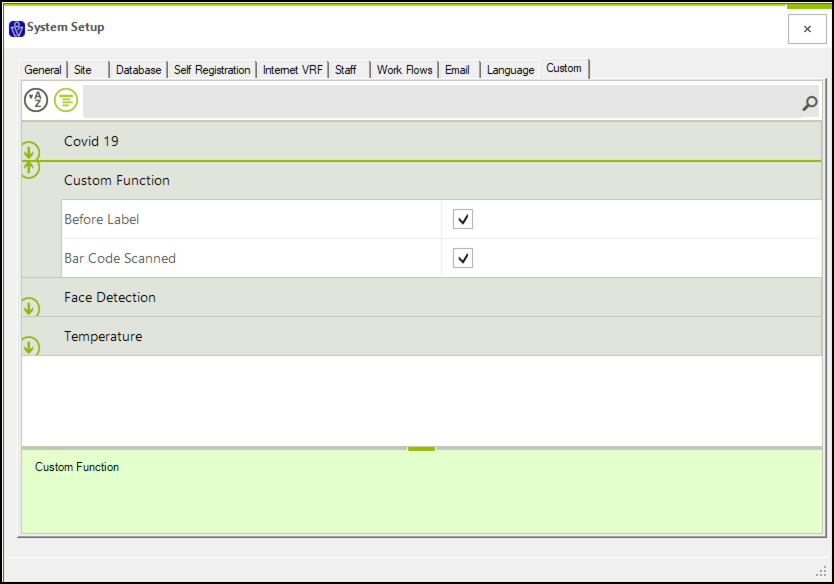
2. Once the System Setup menu has opened, press the F12 key on your keyboard to reveal the Custom tab.
3. Select the Custom tab, then expand the Custom Function section.
4. Check the boxes for Before Label and Bar Code Scanned.
5. Close the System Setup window to save the changes.
If these options are not visible in the Custom tab, supplementary files may be required for the function to work. VisitorRego Support can provide these files and assist with any installation steps needed. These files ensure the Areas function is properly integrated into the software.
Creating and Managing Areas in VR Portal
Adding a New Area
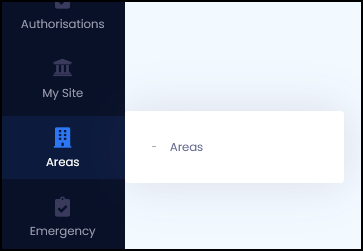
1. Hover over Areas  in the navigation menu on the left in VR Portal.
2. Click on Areas in the Areas menu.
3. Click the  add button to add a new area. The Create New Area window will appear.
4. Enter a name for the area in the Area Name field.
5. In the Select Staff field, either click to open the dropdown list of staff or start typing a name to filter the list.
6. Click a staff member’s name to add them. Their name will appear in the field with an x next to it, which can be used to remove them if needed.
7. Repeat step 6 to add all staff who should have access to this area.
8. Once the area name and staff selection are complete, click Create Area to save the new area.

The area will be created and will appear in the Areas list with the selected staff assigned.
Viewing Staff Assigned to an Area
1. From the Areas page, locate the area you want to check.
2. Click the arrow to the left of the area name to expand it.
3. The list of staff assigned to that area will be displayed underneath the area name.
Adding Staff to an Existing Area
1. From the Areas page, locate the area you want to add staff to.
2. Click the add button on the right-hand side of the area row. The Add Staff window will appear.
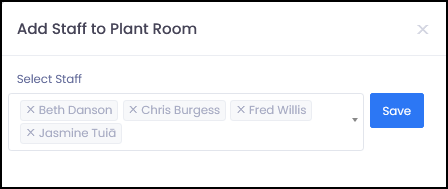
3. In the Select Staff field, either click to open the dropdown list of staff or start typing a name to filter the list.
4. Click a staff member’s name to add them. Their name will appear in the field with an x next to it, which can be used to remove them if needed.
5. Repeat step 4 to add all additional staff members.
6. Once finished, click Save to update the area.
2. Click the
3. In the Select Staff field, either click to open the dropdown list of staff or start typing a name to filter the list.
4. Click a staff member’s name to add them. Their name will appear in the field with an x next to it, which can be used to remove them if needed.
5. Repeat step 4 to add all additional staff members.
6. Once finished, click Save to update the area.
Removing Staff from an Area
1. From the Areas page, locate the area you want to remove staff from.
2. Click the arrow to the left of the area name to expand it.
3. Locate the staff member you want to remove.
4. Click the rubbish bin icon to the right of the staff member’s name to remove them from the area.

Deleting an Area
2. Click the arrow to the left of the area name to expand it.
3. Locate the staff member you want to remove.
4. Click the rubbish bin icon to the right of the staff member’s name to remove them from the area.
Deleting an Area
1. From the Areas page, locate the area you want to delete.
2. Click the rubbish bin icon on the right-hand side of the area row.
Using Areas During Sign-In
Once the Areas function has been enabled in both VR Portal and the VisitorRego software, and areas have been created and staff assigned to them, the function will become active during the standard sign-in process.
When a staff member signs in, if they have been assigned to one or more areas, they will be prompted to select the area they will be accessing as part of their visit. This selection is required to complete the sign-in and is recorded against that entry for reporting purposes.
The steps below outline the full sign-in process including area selection.
1. On the VisitorRego Self-Registration screen, enter your name in the name field as it appears in the staff list, then select enter.
2. Enter any additional details (such as phone number or who you are meeting with).
3. Select the Register button to continue.
4. Review the health and safety content and then acknowledge the site requirements by selecting the Acknowledge button.
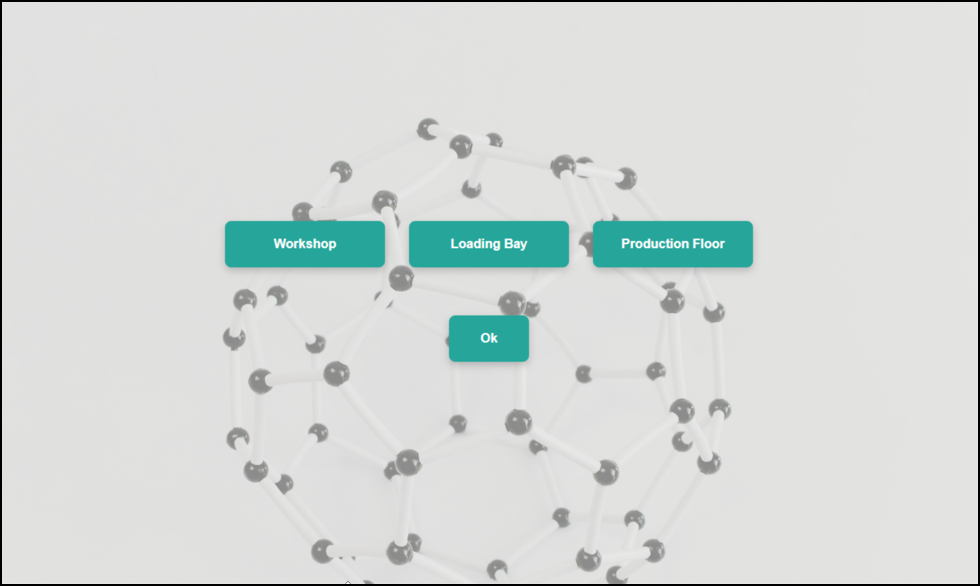
5. The Areas selection screen will appear (if you have been assigned to one or more areas).
6. Select the area you will be accessing from the available options.
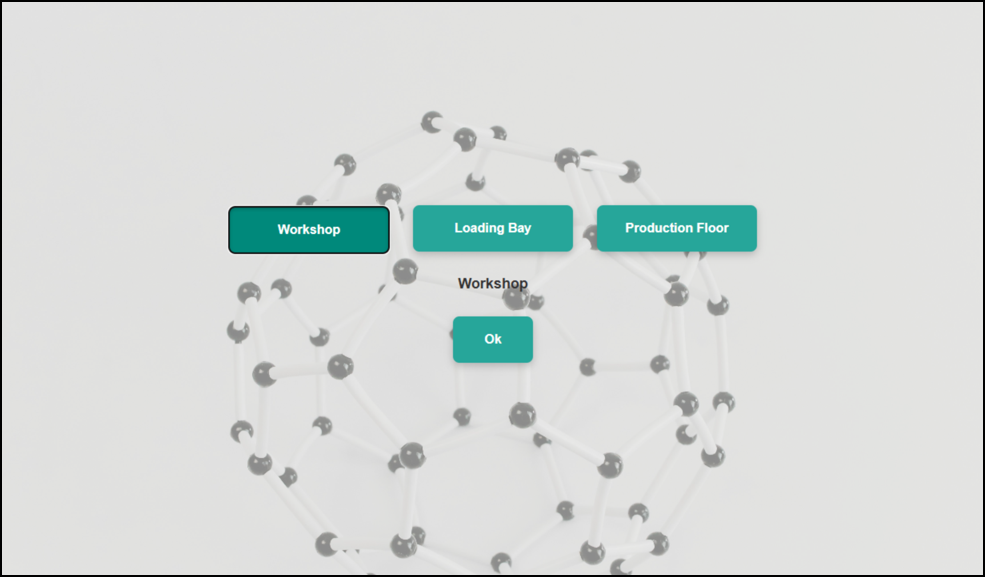
7. Select OK to confirm your selection.
8. The sign-in process will complete and a label will be printed (if enabled), along with any configured notifications being sent.
2. Enter any additional details (such as phone number or who you are meeting with).
3. Select the Register button to continue.
4. Review the health and safety content and then acknowledge the site requirements by selecting the Acknowledge button.
5. The Areas selection screen will appear (if you have been assigned to one or more areas).
6. Select the area you will be accessing from the available options.
7. Select OK to confirm your selection.
8. The sign-in process will complete and a label will be printed (if enabled), along with any configured notifications being sent.
- Staff will only see areas they have been assigned.
- Only one area can be selected per sign-in.
- The selected area is recorded against the sign-in for reporting purposes.
- Only one area can be selected per sign-in.
- The selected area is recorded against the sign-in for reporting purposes.
- The selected area can be printed on the label if configured. Contact VisitorRego Support for setup assistance.
Viewing Areas in Reports
Areas selected during sign-in can be viewed in VR Portal to provide visibility of where staff were working while onsite.
1. Using your web browser, navigate to website https://p.visitorrego.com/ and log into VR Portal.
2. Hover over Register  in the navigation menu on the left.
3. Click on Sign-Ins by Workflow in the Register menu.
For full details on how to use the Sign-Ins by Workflow page, refer to the Sign-Ins by Workflow knowledge base article.
4. Locate the sign-in record you want to review.
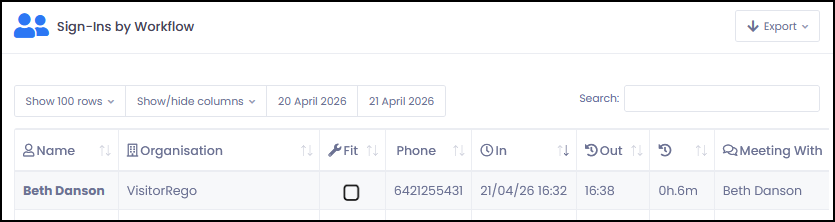
5. Scroll to the far right of the table.
6. Review the last two columns:
5. Scroll to the far right of the table.
6. Review the last two columns:
- Areas Assigned – Displays the areas the staff member is permitted to access (e.g. ["Barn","Shed"])
- Area – Displays the area selected by the staff member during that sign-in (e.g. Shed)
- Areas Assigned reflects what the staff member was authorised to access at the time of sign-in.
- Area reflects what they actually selected during that visit.
- This provides clear traceability of where staff were working onsite for auditing and reporting purposes.
- Area reflects what they actually selected during that visit.
- This provides clear traceability of where staff were working onsite for auditing and reporting purposes.
Related Articles
Sign-Ins by Workflow
The Sign-Ins by Workflow page in VR Portal provides a clear, central view of all sign-in and sign-out activity on your VisitorRego system. It gives a complete history of all visitors, contractors, staff, and any other people who have attended your ...Visitor History
The Visitor History report in VisitorRego's Admin Mode allows you to generate detailed reports of all visitor registrations within a specified date range. The report provides an overview of all sign-ins and sign-outs that occurred during the defined ...Staff tab
The Staff tab consists of two pages: Staff List and In / Out Board. The Staff List allows you to manage the staff list referenced on your VisitorRego appliance. The In / Out Board provides a convenient display of each staff member's status, ...How to Get Reports using VR Portal
To view sign-in records and export reports in VR Portal, use the Sign-Ins by Workflow page. From there you can: Filter by date range Search by name or organisation Export data to CSV, PDF or Excel View sign-in details including who signed in, when, ...Sign-In Audit
The Sign-In Audit page in VR Portal provides a detailed log of all visitor registrations and contractor-related activities, ensuring enhanced accountability and compliance within your visitor management process. This comprehensive audit trail ...